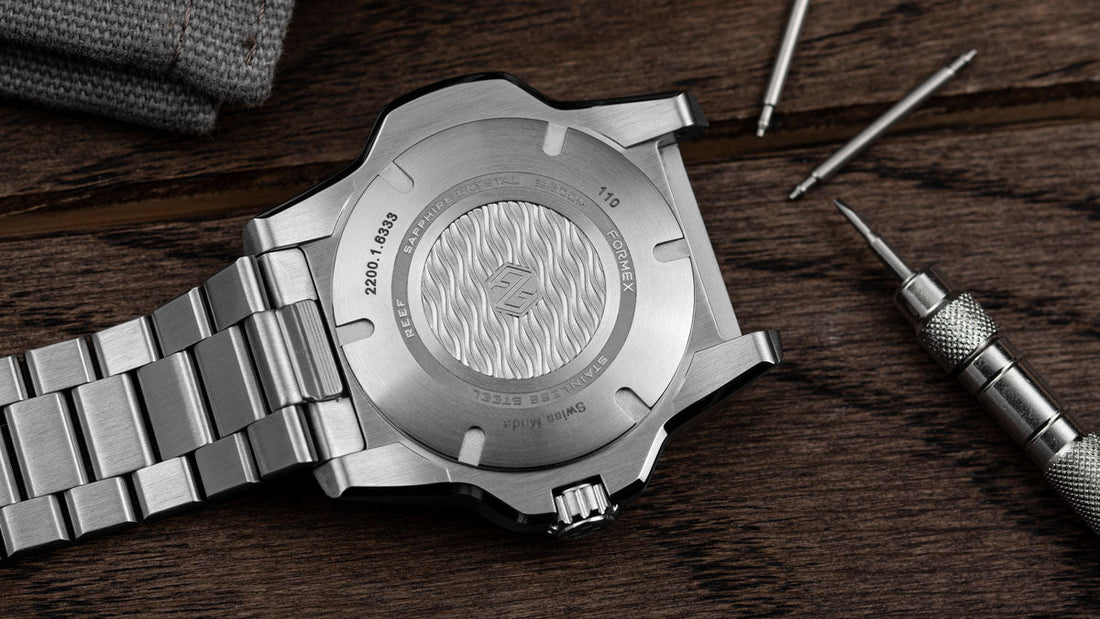

There will be occasions when we may need to remove the screw-down case back on our pride and joy; it may be that it's a quartz and needs a replacement battery, or it may be a mechanical movement that requires a slight adjustment. In this article, I'll explain just how to go about it, along with the reasons and why.
It all sounds straightforward enough, but to do it properly without marking either the case or the case back isn't relatively as easy as it may first appear; there's also the water resistance to consider when re-fitting the case back. Now, when I say 'without marking', I mean exactly that, absolutely no signs whatsoever that the caseback has been touched, including the inside faces and the bottoms of the drive recesses. Let's take a step-by-step look at how it's done.
Table of Contents

The Tools needed to Remove Back of a Watch
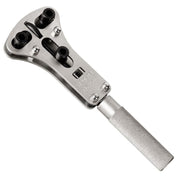
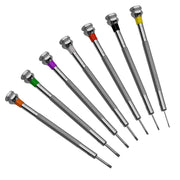
To do the job right, we'll need some basic tools; they're not expensive and should last a lifetime. The first thing we'll require is a spring-bar removal tool, we'll also need a toothbrush. Next up is a case holder; this clamps the case securely and in a way that won't mark the watch. We'll also require a caseback removal tool. My advice is to go for the three-fingered type instead ofthe two-fingered type, and I'll give the technical reason for this later in the article. We'll also need a wooden toothpick, a small piece of cling film, some silicon grease, and, last but not least, some latex finger cots.
What Problems can Occur?
Many people don't think about the conditions when they remove a case back, but if we're going to do the job, let's do it right! Three things can and will cause you problems. The first is dust, the second is stray hairs, and the third is high humidity. If the watch has a screw-down ,case back it will almost certainly be water-resistant to some extent, and this means that whatever is in the watch when the case back is re-fitted will stay there until the next time it's removed. You're not putting a satellite together, but don't do it when the wife is darting about with the vacuum cleaner on full chat! There's little danger of that where I'm concerned, as I usually do it!

Step by Step Guide
The first thing that we need to do is to remove the strap or bracelet, along with the spring bars. If you don't, they will likely get in the way when we place the case in the holder. The next job is to use the toothbrush to remove all the dirt and grime from around the outer edge of the caseback and make sure that the drive recesses are completely clean; use one end of the wooden toothpick if required to get into the corners.
Now we can clamp the case in the case holder. Move the case around until it is held mechanically with the pegs rather than by friction alone; any movement is likely to result in marking the case or the case back. Make sure that the crown never touches any part of the case holder at any time; this is important. Now that the case is held firmly, we need to decide what inserts to use in the caseback removal tool. This will depend on the shape and depth of the drive recesses in the case back.

Damage can be caused in two ways. The first is by the tool slipping off and scratching either the case, case back, or both, and the second is by marking the sides of the drive recesses with the inserts. This is caused by placing too much stress on the caseback material by the inserts. Stress is equal to the applied load divided by the cross-sectional area of contact (don't you just love engineers!) The larger the contact area between the insert and the drive recess, the better. This is why I favour the three-finger tools over the two-finger ones; the stress is spread over three inserts/ recesses as opposed to two.
We can continue once you're happy that you've found the correct inserts for the drive recesses. Take the cling film and double it over, now place it over the case back. Carefully place one of the fingers in a drive recess and then adjust the others so that there is no slack; it's also essential that the fingers are fully down and seated against the bottom of the drive recesses. Now hold the case clamp steady and place the palm of your hand over the back removal tool; do not hold the handle, and try turning it! You can apply equal downward pressure on all three fingers by placing your palm over the center of the case back removal tool. Now turn the tool counter-clockwise while holding the case holder still. Once the caseback has rotated about 45 degrees, you can carefully remove the tool and not drag it. Place the case holder on the table and remove the cling film. Now is the time to put on your finger cots! Unscrew the case back with the middle fingers on each hand and remove.

Why Finger Cots?
Like the rest of your body, your fingers constantly produce moisture and natural oils; they also shed dead skin particles. Finger cots cover the ends of your fingers so that none of these things get into the watch.
Now that the case back has been removed move the watch out of the way and clean the threads and adjacent faces on the case back with the toothbrush. Once this is done, place it on one side, ready for re-assembly. The next step is to carefully remove the 'O'-ring; clean very gently without stretching and place on one side. I always tend to replace the 'O'-ring, but it should be fine if it's in good order and not deformed. Next up is the 'O'-ring groove groove in the case; make sure that this groove is spotlessly clean along with the mating faces. This is where you have to be especially careful! Don't allow any of the debris to enter the watch. Once this is complete, you're ready to undertake the work that you've taken off the caseback to do! Once you've completed this work, it's time to re-fit the caseback. A final check to make sure that everything is spotlessly clean is time well spent.

First up is the 'O'-ring! Lightly coat the 'O'-ring in silicon grease, and I mean 'lightly.' The 'O'-ring should look shiny, but there should be no actual sign of the grease anywhere on the 'O'-ring. This is incredibly important as excess grease will defeat the 'O'-ring's ability to provide a watertight seal. The reason for the silicon grease is to ensure that the contact face on the case back slides over the 'O'-ring and doesn't 'stretch' or 'ruck' it up. Once the caseback is tightened down, the 'O'-ring will settle into its final position over a few minutes. Carefully place the O'-ring into the O'-ring grove, ensuring it seats nicely.
Now take the case back and apply a small amount of silicon grease to the threads with the toothpick. Stainless Steel is notorious for 'picking up,' so a little lubrication is always a good idea; it will also ensure the smooth take-up of the threads. Holding the case back on the edges between your thumb and forefinger, place it in position, and gently start the thread with your fingers. When the case back is in contact with the 'O'-ring, place a new piece of doubled cling film over the case back and tighten down using the case back removal tool, exercising the same care as before. Now remove the cling film and inspect. Remove the case from the case holder and then re-fit the strap or bracelet. Job Done!

How Tight?
Not very tight at all! You'll feel the friction increase as the caseback makes contact with the 'O'-ring, and then, after about 30 degrees of rotation, it will come to a fairly abrupt stop; a small 'nip' is now all that's required. If the 'stop' isn't very abrupt, the chances are you've got tiny debris under the mating faces; should this be the case, remove, clean, and re-fit. People think the tighter they fasten down the case back, the more waterproof the watch will be; it's quite the opposite! It's the 'O'-ring that forms the seal and nothing else. If you overtighten the case back, you'll place extra stress on the thread flanks, and distortion will likely occur.
Conclusion
I appreciate that this step-by-step guide is somewhat in depth; in actual fact, the whole process takes no more than ten minutes if you take your time! More often than not, these things are easy to do but difficult to explain. I hope that some of you find the guide useful, and any comments on the usefulness of this type of article in the magazine will be greatly appreciated; after all, the magazine is there for you; let us know what you think.