
In this article I'll cover removing these unsightly marks from both brushed and polished surfaces so that your watch will look brand new again.
Generally, the main area that requires attention is the clasp, as this tends to get dragged over all sorts of surfaces; bracelets and cases also pick up their fair share as your watch accompanies you on life's adventures. As an ex-Rolls-Royce/Bentley Tool & Prototype Maker, the machining, finishing and refinishing of all types of materials is second nature, but by following a few simple rules, this type of work is well within the capability of most people.
Let's get started with some basic information.
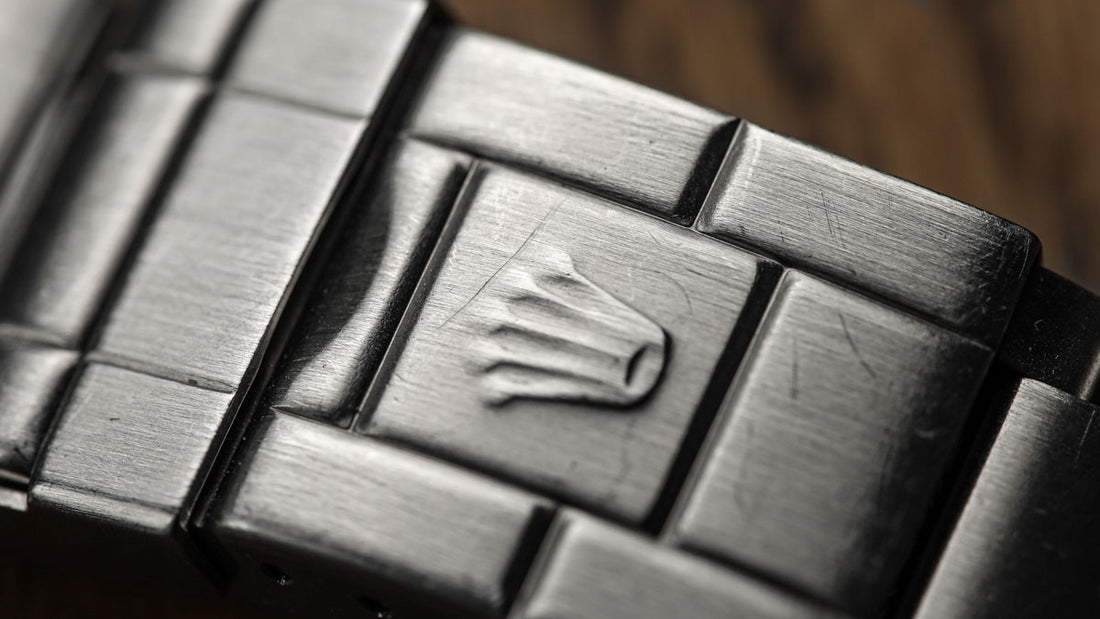
 Rolex Explorer II scratched fliplock - Credit WatchGecko
The Materials found in Watches
The materials found on 99% of watches are 316L stainless steel, 904L stainless steel and Titanium, to be more specific, Grade 2 commercially pure titanium. 316L and 904L are both austenitic stainless steels, they are non-magnetic and cannot have their hardness increased by normal heat treatment methods, although there are advanced methods where this can be achieved. In their normal condition they are relatively soft and many reviewers offer Vickers hardness figures, but these can often be misleading to the uninitiated as other things are at play here. The fact of the matter, is that 316L is marginally harder than 904L, and as such, 904L will pick up scratches more readily. The 'L' in both cases denotes low carbon and reduces the risk of carbon precipitation during welding, this is important for two reasons.
 Omega Seamaster Titanium with heavily scratched buckle - Credit WatchGecko
The first, is that during elevated temperatures the elements of carbon and chromium combine to form a thin, inter-granular band of chromium carbide on the weld interface; this can affect the integrity of the weld through the increased risk of cracking. The second, is that a lower carbon will maintain a higher level of corrosion resistance after welding and is directly connected to reduced carbide precipitation. The really good news here is that unless the case needs welding it doesn't affect our work in the slightest, and has only been included for interest, so next time someone asks you what the 'L' stands for, you'll be able to tell them! 904L contains higher chromium and molybdenum making it more corrosion resistant in seawater; it also tends to take a better polish.
Titanium comes in multiple grades, and not just five, as some would have us believe. Grade 2 is what's known as 'a pure alpha Titanium' and is incredibly corrosion resistant. Grade 2 is slightly stronger than Grade 1, and Grade 5, known as 'a pure alpha-beta Titanium', is less corrosion resistant in certain environments than Grade 2, but much stronger. This subject is incredibly involved and the above offers little more than a very basic overview; apart from that, I'm doing all this from memory, and that's quite a feat considering that nowadays I can't remember what I had for my breakfast half of the time! Now, where was I? Oh yes, power tools.
Power Tools You can Use
Power tools, such as bench polishers, rotary sanders, linishers along with Dremel multi-tools are not required, in fact, they'll just cause you more problems, many of which will not be rectifiable! It's a common misconception that power tools such as these will get the job done quicker, don't be fooled by this, they don't! No exceptions for this type of work!
Limitations
This article covers minor scratches that your watch will pick up during everyday use; removing these scratches, marks and scuffs will return your watch to 'as new' condition. These methods cannot be used on coated cases such as IP, DLC, PVD or any Titanium coatings such as Citizen's 'Duratect' and the suchlike. The scope of this article does not cover more serious damage, although much can be achieved with the minimum amount of kit. Knowledge is the key here!
What do we need to Remove Scratches on Your Watch?
 The Top 10 Best Watch Tools Every Watch Collector Needs Article
- Regular price
- $144.00 AUD
- Regular price
-
- Sale price
- $144.00 AUD
- Unit price
- per
- Regular price
- $144.00 AUD
- Regular price
-
- Sale price
- $144.00 AUD
- Unit price
- per

- Regular price
- $144.00 AUD
- Regular price
-
- Sale price
- $144.00 AUD
- Unit price
- per
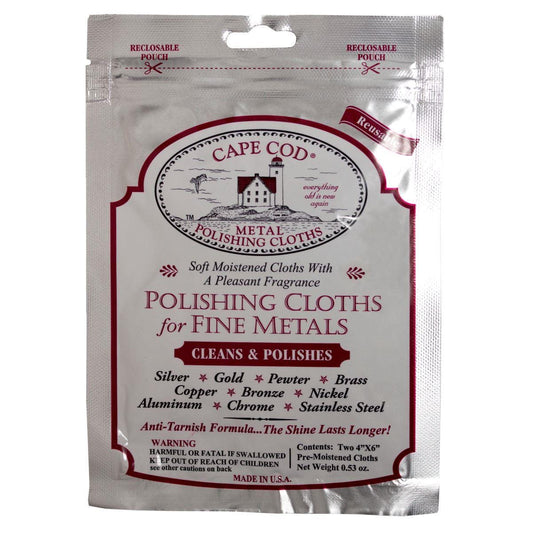
I tend to use P600 & P1500 'WetorDry' paper by 3M and a Scotch-Brite 96 green scouring pad. We also need some metal polish; I tend to favour 'Autosol' and 'Duraglit' wadding. These do slightly different jobs depending on the final finish required. A couple of soft, cotton cloths and a large dollop of patience, this last item seems to be the hardest to get hold of!
Here is an Example using an ORIS
First up is an unsightly scratch on an ORIS clasp. The clasp material is Grade 2 Titanium, and the finish is brushed with a 'softening' polish. The second is a scratch on the side of a polished case. The case material is 316L stainless steel and the finish is mirror polish. Both of these scratches are quite deep and have been applied with a scriber; please excuse any typing errors as the tears are still rolling down my face. As we continue, I'll cover each one in turn, explaining the method and what to look out for; hopefully, the 'before and after' images of each will make the whole thing much clearer, as well as offering an idea of what the finished item should look like. Unfortunately, my photographic talents are sadly lacking and I'm sure that Alice, our professional photographer, spends a good deal of her day rolling around the office floor in laughter; however, every cloud has a silver lining as they say and I've been able to travel the world at will for a good many years without ever being mistaken for David Bailey!
The ORIS clasp
 Oris with a scratch - Credit Guest Author
- Regular price
- $19.00 AUD
- Regular price
-
- Sale price
- $19.00 AUD
- Unit price
- per
- Regular price
- $17.00 AUD
- Regular price
-
- Sale price
- $17.00 AUD
- Unit price
- per
- Regular price
- $9.00 AUD
- Regular price
-
- Sale price
- $9.00 AUD
- Unit price
- per
As you can see, there's a deep scratch on the clasp that we need to remove. The first step is to remove the clasp from the bracelet. This will only be necessary for the first few times until you're more confident. Once you've mastered the process of removing the scratch, it can be done by just holding the watch, and will only take a few minutes.
We'll start off with the P600 paper. I tend to have a small, moist sponge in a dish to wipe the paper on; the water in the dish should contain a small amount of washing-up liquid in order to lubricate the paper and remove the particles so that they don't generate new scratches. Always move in the direction of the original brushing, never across it. Don't be tempted to concentrate on the area around the scratch, take the paper over the entire face. Once the scratch is invisible to the naked eye, change to the P1500 paper and repeat, this is to finish the clasp to a finer finish than we need. We always brush a smoother surface to a rougher finish rather than trying to brush a rougher surface down. It's this attention to detail that will obtain the results that others can't.
 Oris and the scratch is gone - Credit Guest Author
We can now progress to the Scotch-Brite pad.
Brush the surface with the pad in the same direction, again, holding a straight line; don't worry, you'll soon get the hang of it. Once you've obtained a consistent, straight brushed finish, the job is almost done, in fact, to many it's completely done! Now the bit that sets your work apart from the rest. Check the brushed finish on other parts of the watch and bracelet, if you have a keen eye you may notice that although the finish is almost identical it's just not quite there yet. The Scotch-Brite pad in that grade will leave the surface ever so slightly courser than that applied by many manufacturers. This is the only time we break the rule above! Take one of the cotton cloths and put a small amount of Autosol metal polish on it, no more than a smidgeon and rub it in evenly over a small area of the cloth.
Now, evenly, and very lightly, rub the surface in the direction of the brushing until it matches the brushing applied by the manufacturer exactly. When you've done, wash the clasp in some warm, soapy water and dry before refitting. All that remains now is to brew-up, sit back with a chocolate digestive and admire your work! The same procedure applies to all other areas of the clasp and case. If you're dealing with brushed and polished areas, do the brushing first, then mask with 'Sellotape', although there is a specialist tape if you prefer. Always finish the polished areas last and then remove the tape; any residual adhesive may be removed with acetone (nail polish remover) or a little methylated spirit, depending on the adhesive.
The Polished case
 Unique polished Geckota Phalanx with case scratch - Guest Author
This is much easier, although much more care needs to be taken. I normally remove the strap or bracelet to make things easy. Start with the P600 paper, using the same procedure as before, following the 'line' of the case. As previously, don't be tempted to concentrate on the scratch directly, cover a much larger area. Once the scratch is no longer visible to the naked eye move on to the P1500 paper and repeat. If the scratch is very, very light you may start with the P1500 grade paper, but it has to be a very, very, very light scratch! Once the finish is smooth and consistent, take the cotton cloth and apply a small amount of 'Autosol'. Rub the area carefully, again, following the 'line' of the case. Don't apply too much pressure, let the polish do the work. Be extremely careful that the cloth doesn't touch other parts of the watch, like the edge of the bezel if it has one, or a brushed area on the case; it's all about attention to detail. Also, be very careful around chamfers, these edges must be maintained or they'll stand out! Work involving these features will require additional tools, techniques and skill sets.
Once the desired finish has been attained, clean the watch and refit the strap or bracelet. A watch with a minimum water resistance of 200m (20 bar) may be cleaned with a toothbrush in warm, soapy water and rinsed under the cold water tap before being dried. You may notice that some very light polishing scratches are visible under certain lighting, this is because you've applied too much pressure in the final stages or there's been debris on the cloth. In this event, repolish as required. Top tip! Check to make sure that the crown is screwed down before washing.
 Same Phalanx and the scratch has been removed - Guest Author
Some people set up guides but generally speaking, using a guide is much more trouble than it's worth, and is likely to cause more problems than it solves. Take your time and pay attention to what you're doing; like all new skills, they take time to master. Be methodical and don't be impatient.
Once you've done this a couple of dozen times and gained a little confidence, you'll be able to work in straight lines and curves without thinking about it. You'll be able to assess the finish that needs to be reproduced and know exactly how to achieve it. The secrets are don't rush, and don't look for short-cuts! Never, ever use power tools and pay attention to every detail, remembering that the abrasive paper and pads can, and will, damage other parts of your watch if you're careless. Don't rush, you'll get quicker after you've done it a few times. To give some idea of the time taken when you're more confident, these two scratches took less than fifteen minutes in total, and that included getting the stuff out and tidying up afterwards!
I do hope that these few pointers prove to be useful, and assist you in keeping your watch in pristine condition, even when life's little obstacles get in the way occasionally!